Tutorial For small collar 013
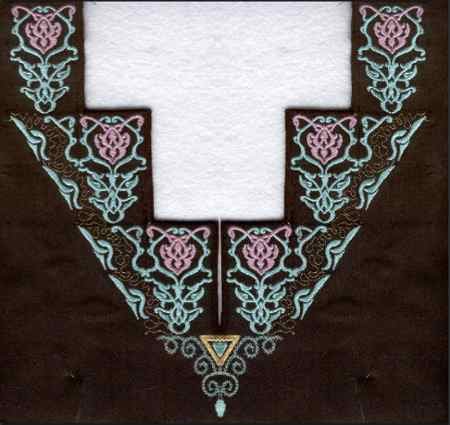
Setting up scollar013 is a little different from the other more geometrically aligned patterns in the small hoop group. With accurate measurements and knowledge of some key joining points, this pattern will go together nicely with beautiful results. The pattern is symmetrical on both sides, but the aligning stitches don't "snap" together, like some of other designs, as an aid for placement. It is best to start at the bottom with scollar013c and work upwoards towards each shoulder portion.

1- To begin, mark a line down center seam. This will be vertical line "A". Mark another line horizontal to line "A" . This will be horizontal line "B". Make this line about 12" long. This will be the center point of the designs unit scollar013c. Embroider scollar013c.
2- From the center point of scollar013c, measure up 70mm along line "A".....center seam line. Draw a line parallel to horizontal line "B", The same length of Horizontal line "B" . This will be horizontal line "C". This will be the placement line reference of the next embroidery units. Measure 27.5mm to the right of the center seam line "A". This is the starting point of design scollar013a. Embroidery design scollar013a. You will notice that the black aligning stitches don't stitch on the top of previous scollar013c but overlap slightly and the lower vertical left satin stitch edge barely touches the top of scollar013c.
3- To place design unit scollar013b, measure 70mm center seam line "A" to the right. staying along horizontal "C". Don't mark yet. Move down 2mm and mark. This is the starting point of scollar013b. Embroider the unit. Again, notice the aligning stitches overlap the other design units.
 scollar013
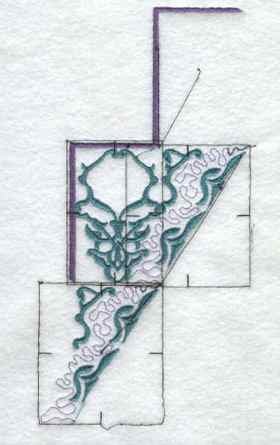
4- Repeat the process for the left side staying along horizontal line "C" and mirroring imaging the designs.
5- Draw another parallel horizontal line 78mm up from line "C". This is the line "D" and you will be along this line reference in the next row as the previous one. Measure to the right of the center seamline "A" 77mm to the right. This is the starting point for the next design unit scollar013a. Skip to color 2. When the embroidery starts color 2 the first long jump will hit the upper right edge of the outlining satin stitch from the previous design 006a on line "C". This is a good reference that you are in proper position. Finish embroidering the design unit.
6- measure to the right 118mm from center seam line on line "D" . Move down 2mm and mark. This is the starting point for the last scollar013b.
7- Mirror the image and embroider the left side along line "D".
8- For the last design on the upper right, draw the last horizontal line 78mm up from and parallel to line "D" crossing center seam. Mark at 123mm to the right. Again skip to color 2 and check position in as in step 5.
9- Mirror the image and repeat the last design unit for the left side.
Hints: The black aligning stitches are not as critical as accurate measurements and the ability to manuver the hoop for proper placement .
* If your machine has the ability to advance stitches without embroidering , you can check few critical points to make sure your placement is accurate.
& Again, this design is best worked from the bottom to the top fanning out to each shoulder area. it is approximately 12" long.
& Check the accompanying samples, you can visualize where the black aligning stitch will fall. Also note the upper right hand design. This where the jump stitch should fall when you are checking for design scollar013a position