Tutorial For Small Collar 015
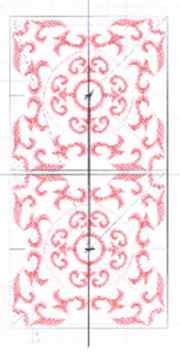
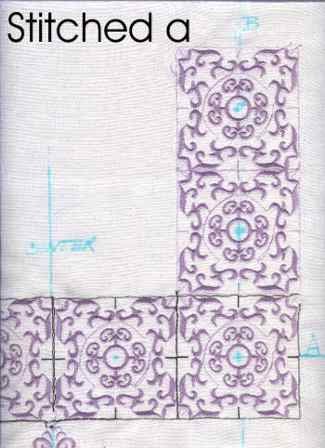
1- As a rule you should follow with any design is that TO Draw A template for this design before going to stitch it. Make a paper template or sew out a design unit on a piece of scrap fabric or felt, to use as one. The template will help you to position the design units perfectly.
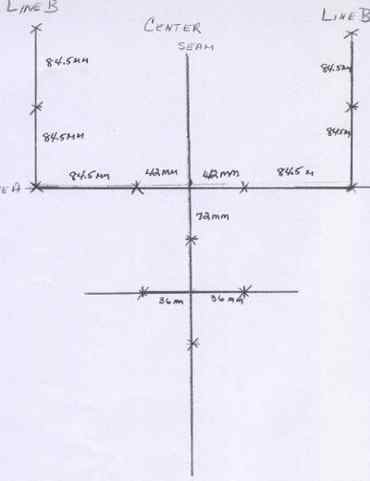
2- Mark a horizontal line accross center seam. This is Line A. Four of the larger designs will be placed here. Using your center seam as a mark, measure 42.5mm to the left and right of the center seam line. These are the center marks for the first 2 designs units, one to the left and another to the right of center seam.
3- Staying along line A measure 84.5mm from the center of each of the first two designs units. Place a mark 84.5mm to the left of the left center design and another 84.5mm to the right of the right of center design. This will mark the placement of the four designs units that form the yolk.
4- To place the designs units that will form along the shoulders, draw a vertical Line B through the center of the right outside design unit. Measure up 84.5mm from the center of the outside design along line B . This will place the first design on the right shoulder.
5- Again along Line B, measure up 84.5mm. Place a mark. This is the center for the last large design along the right shoulder.
6- Draw another vertical line B through the center of the outside left design. Repeat markings as on the right.

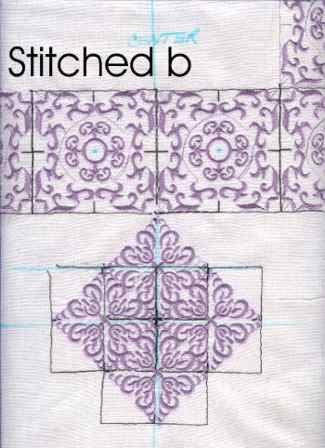
7- To form the diamond motif below the yolk, measure 72mm down the center seam from Line A. This point is the center for the first small design unit (scollar015a).
8- Staying on center seam, measure 72mm down from the center mark of the first unit (scollar015a) . This will mark your second small design center.
9- To place the last two small designs, draw a horizontal line 35mm down from the center mark of the first small design on center seam. Each small design center will be 36mm to the left and right of the center seam on this horizontal line.
Tip:
Using
these measurements, the black aligning stitches for the large designs
will overlap on top of one another and the notches will align together.
This makes it easier to judge from one hooping to the next if you are
centered properly. This is helpful especially if you are using 4x4 hoop.
Also, using these measurements, the larger designs will be separated
by a few mm's. If you want the designs to touch, you can move the hoop
a 2mm's closer to the previous design.
On the smaller design unit (scollar015a), the black aligning stitches will
cross on top of the notches of the other \r\n