FREE STANDING LACE COLLAR [part 2]
This second part you cut at the left side only.

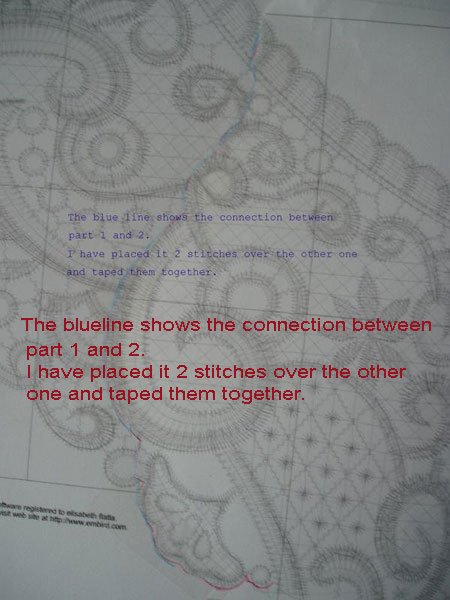
Then, place it on top of part nr. 1, but not edge to edge like
we do when embroidering it as an ordinary design.
As you will remove the base on which it is embroidred, you must be absolutely
sure
to place part nr. 2 and all the other parts a couple of stitches into the one
before. This means that when it is embroidered, the design will be fastend together
in the right way by these stitches done, into the other part.
Go on connecting all the parts in the same way.
You now have the collar design combined in the right way not to fall appart.

If you have not got a water soluble material wide enough for the whole design, simply stitch 2 parts together with large stitches to be removed after finishing the embroidery.
If your soluble material has a tendency to sometimes burst during embroidering, you must absolutely use 2 layers of this meterial for this design.
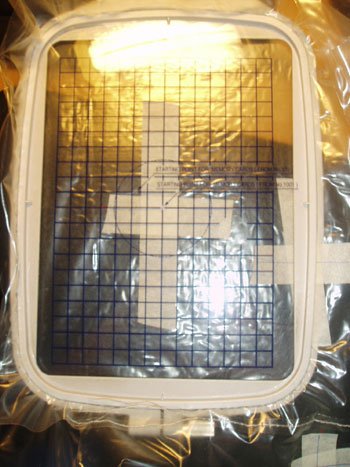
Now it's time to start marking the placement for each part.
We use the masking tape method.
Place the soluble material on top of the design and be sure that it during marking
the points absolutely doesn't move.
Mark the middle on all parts and put a point on each of the 4 lines .
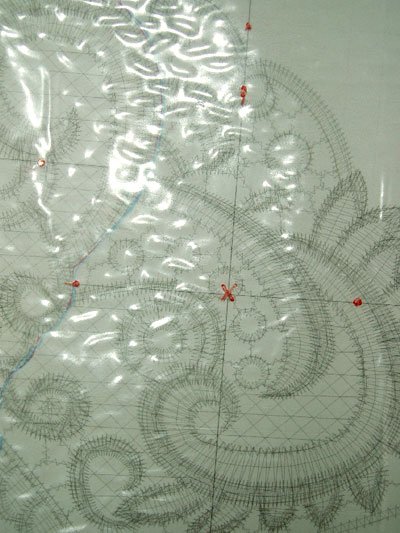
Place masking tape on top of the lines without covering the outer points, because you have to use those points to draw the lines on the masking tape.
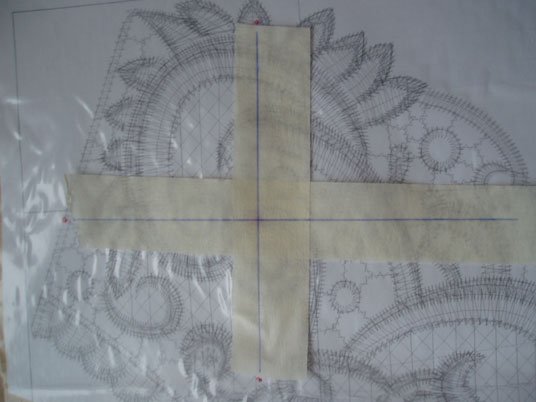
Do the same on all the parts.
When you are done, it's time to start embroidering.
But, if you have a thin soluble material, don't forget to place another layer
under it.
Do the first placement for embrodering the part nr. 1 by following the lines on the masking tape. Don't forget to remove the tape before starting the embroidering.
On every part you embroider,cut the unnecessary long jumpstitches even on the back before emroidering the next. If you don't , these stitches will make the finished design look messy.
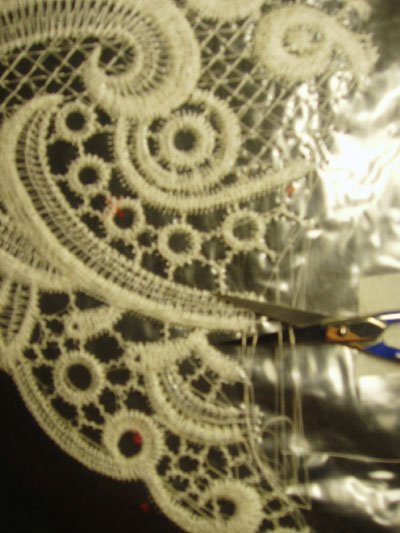
This technique has been used for embroidering this design.
As you can see, it worked fine.
Follow this tutorial, and you will end up with a perfect design.
Good luck.